
Set up a Zap to populate a Google spreadsheet with payments recorded in Details
Setting up a Zap to automatically send logged payments to a spreadsheet is a great way to organize your financial records. Before you get started, we recommend setting up your Google Sheet first.
Note: This is not retroactive and will only apply to payments logged after implementing this Zap.
Trigger
- First, click the Make a Zap button.
- In the search bar, type in Details Flowers and select it as your trigger app.
- Click New Payment and then Save + Continue.
- If you have not already connected your Details account, click here to learn how. Otherwise, it will pull up your Details account - click Save + Continue.
- Pick a sample for the next step - it does not need to be a current payment. Click Continue.
- Optionally, you can select a state or status to activate the trigger. We'd recommend leaving these fields blank so no payments are excluded, but you're free to set whatever preference you'd like.
- Continue to the Action stage.
Action
- Choose Google Calendar as your Action App.
- Select Create Spreadsheet Row as your Action and then Continue.
- If you haven't done so in your Zapier account before, connect your Google account and continue.
- There are only two required fields to select values for: Spreadsheet & Worksheet. Select the Spreadsheet you created and the applicable Worksheet. Once complete, you'll see the page expand to include fields for each column header in your spreadsheet.
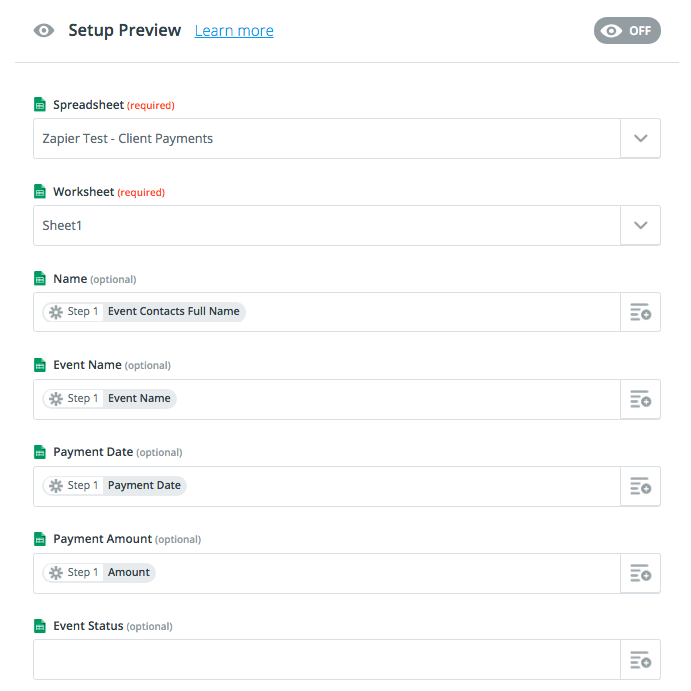
At this point things open up for you to customize this Zap to fit whatever your needs are. The example above is to give you an idea of how to go about this, just keep in mind that our fields may differ from yours and the values we've chosen for them are just suggestions.
Note: Remember, these fields correlate to column headers from the connected worksheet.
Once you've input the desired values for the available fields, continue on to the test portion and run it. Then, finish and activate your shiny, new Zap!
Check out the Zapier Learning Center!