The Design Board: Updating A Recipe From The Item Gallery
Did you know that you could update a recipe that you have on your 'Design Board' from within the 'Item Gallery'?
That's right! If you have a recipe on your 'Design Board', you can easily add and remove items directly from the 'Item Gallery'. Let's dive right in!
Design Board
To get started, you must first make sure you have a recipe on your 'Design Board'. This can be a pre-made recipe with items or recipe images yet to have items attached. Whether you use the '+ Add Recipe' button on the 'Design Board' or favorite from your 'Recipe Gallery', it will all work the same.
💡Please note that you must be inside of an event to update a recipe from the item gallery.
Item Gallery

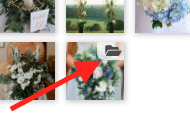
Once you have your recipe(s) ready, head on over to your 'Item Gallery' located under 'Resources' at the top of your event screen. Once in the 'Item Gallery', hover over the recipe you would like to update to reveal a file icon.
This will show all of the items currently attached to this recipe. If you have no items attached yet, it will say 'No Ingredients'. From there you can click the 'x' in the upper right-hand corner to remove any item within.
Adding Items
To add items to a recipe, follow these steps
- Click into one of your collections on the left-hand side.
- Once there, click the 'Options' button at the bottom of the screen and select 'Selection Mode'.
- Using 'Selection Mode', click on the items you wish to add to your recipe.
- Click the 'More' button at the bottom of the screen and select 'Add To Recipe'
-Apr-18-2022-08-16-29-96-PM.gif?width=600&name=ezgif.com-gif-maker%20(5)-Apr-18-2022-08-16-29-96-PM.gif)
💡Please note that any changes you make through this process will update your recipe within the Recipe Gallery automatically.
