
Note: If you're not very familiar with the Event List, we'd recommend checking out this Support Center article too!

In addition to the parameters above, you can also search by 'Custom Properties' set by you on the 'Details' page of your events!
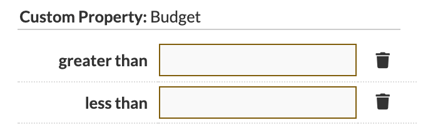
💡Click here to learn more about creating custom properties!
Accessing the Search
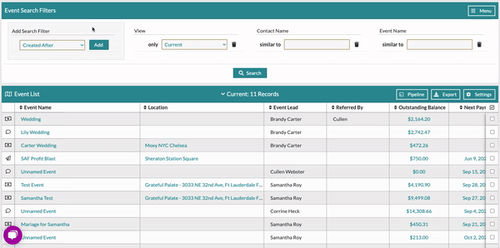
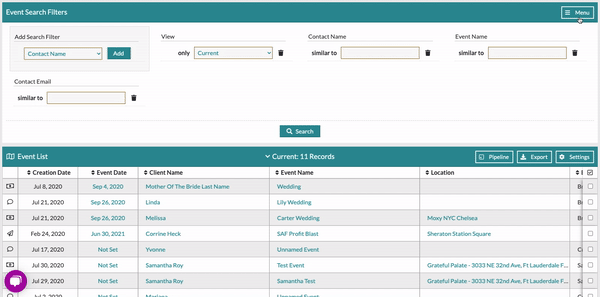
Get to the search panel by clicking the 'Search' button in the top-right of the Event List. You'll see the Event Pipeline flip over to a search panel.

💡Special Tip: In your Event List Settings, you can set the search panel as your default view in place of the Event List Pipeline!

Selecting Search Fields
Use the 'Add Search Filter' drop-down in the top-left of the search panel to include any parameters you'd like to search or filter the Event List by. Select the parameter and click the 'Add' button.
You're also able to add the same parameter multiple times. Need to search by multiple names? Add the 'Contact Name' field as often as you'd like to search by multiple names. This works for many of the fields, so feel free to experiment with it.
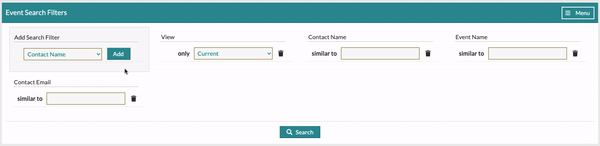
🗒️ Fields left blank will not be included in executed searches.
Executing & Clearing Searches
Once you've entered all the search values you need, click the 'Search' button at the bottom center of the search panel.

To clear an executed search and start over with empty search fields, click the 'Clear' button at the bottom-center of the search panel.
Setting a Default Search
You're able to customize the fields that are displayed in the search panel by default!
We'll set it to include the Contact Name, Event Name, and View fields by default, but you can change it to suit your specific needs. Follow the earlier instructions for selecting the fields you'd like in your view, and then click the 'Menu' button in the top-right and select 'Save Default' to update.

Saving Search Templates
Have a particular custom search you're using repeatedly? Save it as a template for quick and easy use whenever needed.
Follow the earlier instructions to set up the search to include all of the fields you'd like, and then click the 'Menu' button in the top-right, select 'Save Search/Report,' and there will be a few options to choose from in the resulting window:
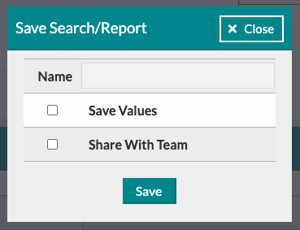
- Name: Pretty self-explanatory here - give your search template a name to remember it by!
- Save Values: Check this box to include the values of a search in your saved templates. For example, saving a search that includes results for any events with a specific Event Lead from your team would need to include the value of which team member is being searched.
- Share with Team: These searches are saved by the user, not by account, so if this is a saved search you'd like every user on your account to be able to access, you'll need to check this box!
Loading Search Templates
Okay, you've saved a search; now let's cover how you'll use it!
From the search panel, click the 'Menu' button in the top-right and select 'Load Search/Report' to pull up a window listing each of your saved searches. Select the one you want and click 'Load Template' - that's it!
Building Reports
We've looked at how to use the search panel to execute various searches, but this area doubles as a report builder. Use these searches and templates to pull custom reports from your event list!
You could create a report to look at your taxes within a specific timeframe or all the events referred to you by a specific contact. The possibilities are nearly endless!
Check out our walkthrough video to learn more about the 'Event List' search and building custom reports below!