The Event Details: Navigating The Event Details Page
Here, we are ALL about the Details. From start times to locations, this page has it all!
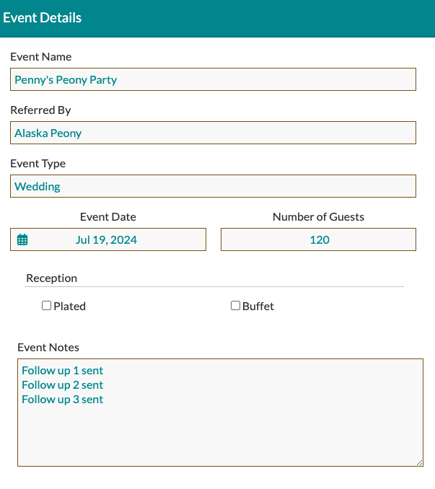
On the 'Details' page of your event, you can put in all of the times, locations, dates, delivery locations, and more. To start, fill in your 'Event Details' section with:
- Event Name
- Who Referred This Client To You (If Applicable)
- Event Type
- Event Date
- Number Of Guests
- Select If The Reception Is Plated Or Buffet
- Event Notes

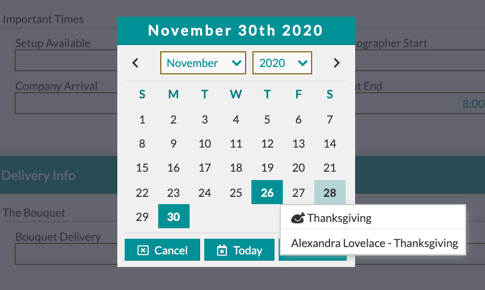
💡The 'Event Date' picker now shows upcoming holidays and future events to help you keep track of what's coming next so you don't overlook! This will default to US holidays, but you can change to Canadian, Australian, or UK Holidays in the My Account section of your account. Check out this article for more information.

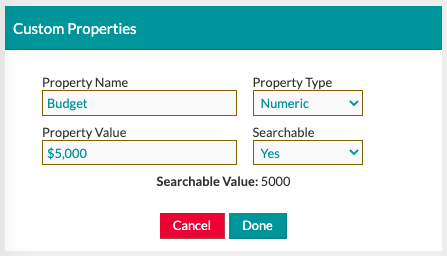
Now it's time to add 'Custom Properties' to your event. These can be anything, such as the budget for the event, invoice number, or even a URL link, such as your client's Facebook or Pinterest.

💡Check out this Support Center article on custom properties to see them in action!
The 'Event Schedule' section will help you track the locations and important times that make up the event. These fields will show on the proposal's 'Design Agreement' page to show the client that you know their schedule and that it is just as important to you as it is to them! The location fields also have 'Auto-Complete' to help you load in a venue that you frequent, often saving you time.

The 'Event Delivery' section will help you track where your arrangements need to be delivered on the event day! This information will be generated into the 'Delivery PDF' in the 'Documents' section of the event, allowing you to provide the delivery driver with information on where to drop off your arrangements.

The ‘Times & Location’ and ‘Bouquet Delivery’ field labels can be customized to match the type of event you’re working on. To update these labels, click the paper and pencil icon. A pop-up window will appear, allowing you to choose your preferred labels from a series of drop-down menus.
When editing linked label groupings, you’ll notice a link icon on the right-hand side—this indicates that the two fields are connected, and updating one will automatically update the other. To unlink them, click the link icon, as shown in the video below.

At the bottom of the page, you can enter the information for other vendors participating in the event, such as the cake baker, photographer, and band. Add additional vendors using the 'Add Vendor Team' button or remove unwanted lines by clicking the 'X' to the right!

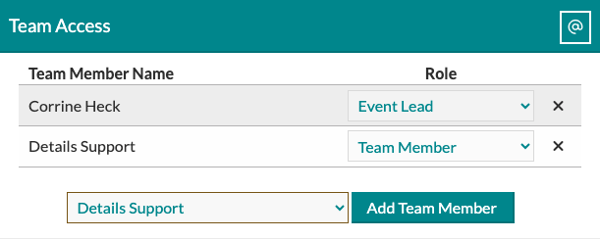
Last but certainly not least is the 'Team Access' section. Here, you can add as many team members as you would like who will be helping with this event. Users listed as 'Employees' will only have access to events they are assigned to using the 'Team Access' section, so it is important to list any of your 'Authorized Users' who may need access to this event.

Once you have filled out all of the applicable information, click the 'Save' button at the bottom of the page so you don't lose any of your hard work before navigating away from the page!
