Access your Event Defaults in the main menu under the 'Company' section. In this article, here are the items you will learn to adjust on your Event Defaults:
- Markup
- Admin Fee
- Tax Rates
- Categories and Line Items
- Fees
Markup:
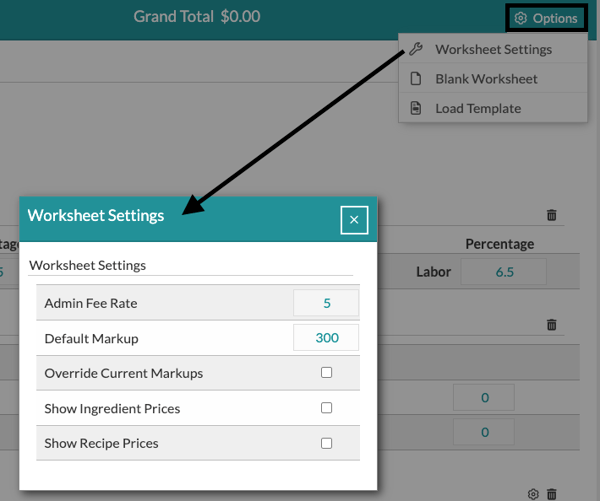
Your default markup may be adjusted by clicking the "Options" button in the upper-right corner of the screen. As a reminder, prices are calculated by taking the cost x markup + cost. More simply put, take the markup you see and add 100%. This is the total markup your recipes are using.
Admin Fee:
Do you like to add a percentage to your events to pass along any credit card fees? Details makes this easy! Click the 'Options' button in the upper-right corner of the screen and type in your percentage in the Admin Fee box.
Please confer with your accountant before you charge any convenience fee to learn if it is legal in your state and/or how to appropriately apply it.
Tax Rates:
If you're just starting, you should see a tax row on your Worksheet already. Enter the rates appropriate for your area. If you do not charge tax on Services/Labor, enter '0'
If you're adjusting your taxes and do not see the tax row, click, hold, and drag a tax section over to your Event Default Worksheet (you can even do this within a specific event!)
A note on line item taxes: On the far right of each line item, you'll see a "TP" or "TS". This tells the software whether to categorize that line item as a product, service, or tax. Right-click the "TP" to change this. If you do not charge tax, no tax will be applied. "NT" stands for non-taxable product.
Sections and Line Items:
One of the most important portions of updating your Event Default worksheet is setting your preferred sections and line items, so when you enter a new client, most of the work is already done!
- Hover over the section/line item name and click to change the text.
- Click, hold, and drag a line item to change the order.
- Click the 'X' to delete the line item, or click the trash can to remove the entire section.
- Click inside the 'Est Price' box to update the line item with your average prices - the price will automatically "lock" in. Click the lock again to unlock it. (Locked line item prices will not adjust as you build recipes. They will stay as you set it). The Estimated Price is important when completing quick quotes - think of this as your average price.
- OPTIONAL: Click the "+" sign to add a note or description. For example, do you always offer a complimentary toss bouquet? Add in a note! This will load for every new client.
- Want to learn more about adjusting your line items? Check out this article: Can I adjust line items for a specific event?
Fees:
Do you like your fees to be itemized with the rest of your line items? Alternatively, maybe you prefer tacking on 20% to each event. Whatever your preference, Details can make it happen! Special Note: If needed, fees may be adjusted within the event itself.
Read each section below to learn the basics. For a more in-depth tutorial, check out this article: How do I add fees to my event?
Fees: Itemized with your line items:
For this, use a 'Category Group' (or the 'Services' category that already lives on your worksheet). Add in your quantity and price. Make sure you change it from 'TP' to a 'TS' or 'TL'. Want to learn more about the TPs, TLs, and so on? Check out this article: What is the difference between a TP, TS, TL, and NT?

Fees: Using percentages & staffing section:
Using the 'Fee' or 'Staff and Labor' section gives you more flexibility; however, it's important to note that these will not show with the rest of your line items. If you would like them itemized, you must include the Breakdown Page of the proposal. Like the line items above, you can change the information in your Event Staff and Fees section.
To add a percentage fee:
- Add a fee row (click below the group). Add in a name.
- Select what you would like it applied to. Most commonly, this will be 'Products'
- Change the type to % via the drop-down.
- Type in the amount (For 10%, type in 10. Do not use .10)
- The Fees section will always default with a 'TS' - please change it to 'TL' if you wish to have it categorized as Labor.
Once you click 'Save' at the bottom, your changes will be applied to the next client you add to the system.
The Staff & Labor section:
- This provides you a space to list out members of your staff, the qty, hours, and rate. This area will automatically be classified as 'Labor' and can be itemized on the Breakdown page.
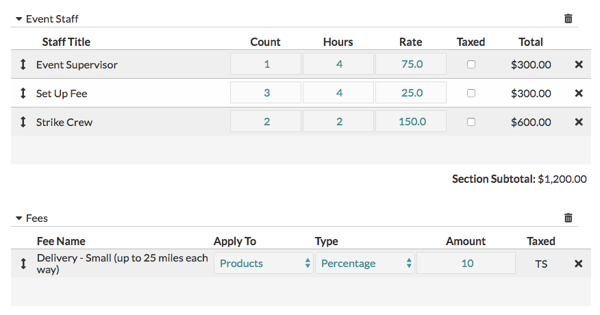
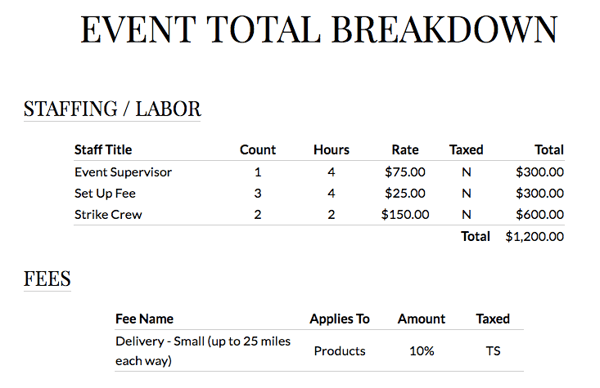
Here is how the 'Fees' and 'Staff and Labor' sections will show on the proposal Breakdown page.