
We've outlined the general steps for you below, but please note there are a few different ways you might choose to set up your zap.
Note: This is not retroactive and will only apply to events you created after implementing this Zap.
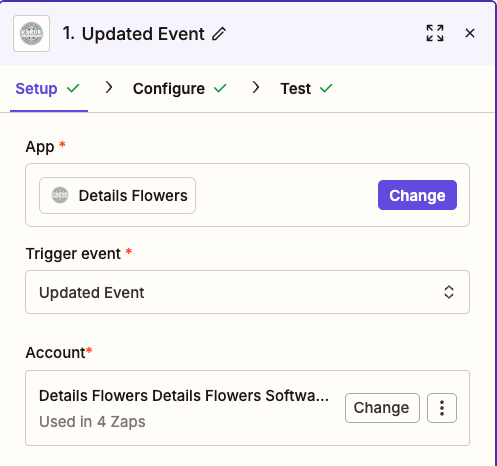
Trigger
- First, click the Make a Zap button.
- In the search bar, type in Details Flowers and select it as your trigger app.
- Click Updated Event and then Save + Continue.
- If you have not already connected your Details account, click the Connect an Account button and follow the prompts. Otherwise, it will pull up your Details account - click Save + Continue.
Here on the Edit Options step of setting up your trigger is where you get to customize this Zap to your specific need. You'll need to decide what causes Zapier to create a new invoice in QuickBooks, and it's primarily driven by two things: state and status.
Since this is where you'll customize your Zap, this is also where things become pretty open-ended. To help you understand how this will work, we'll go through an example of one of the many ways you can set this particular Zap up.
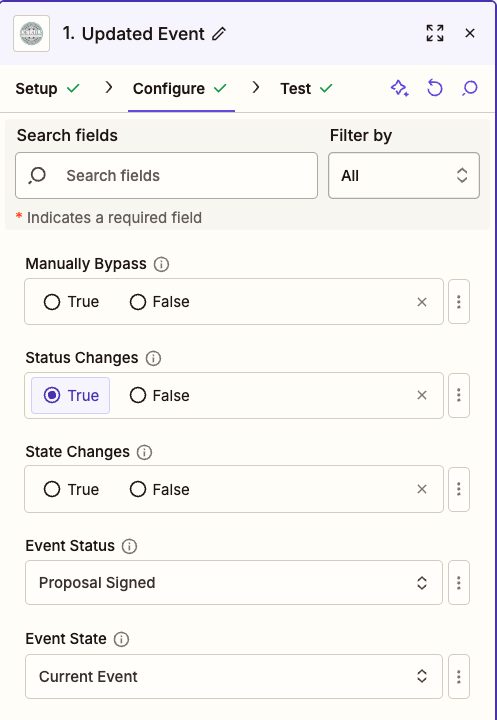
- For the Manually Bypass option, keep it as No
- For the Status Changes option, select Yes
- Click the Continue.
- A sample will be pulled in from Details and automatically selected. Click Continue to complete the trigger portion of this Zap.
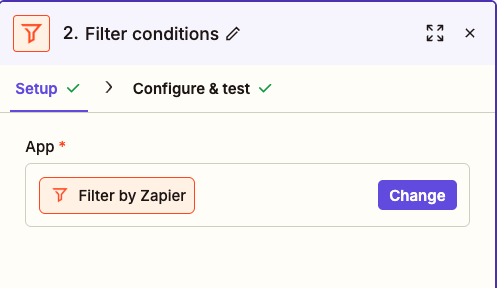
Adding a Filter Step
In the next step, you will need to add a 'Filter By Zapier' action
Next, hit the 'Continue' button. From there, you will fill in the associated information for the filter:
Only continue if
- Event Status - chose this from the first drop-down menu
- (Text) Exactly Matches - chose this from the second drop-down
- In the third field, you will type in 'Proposal-Signed'
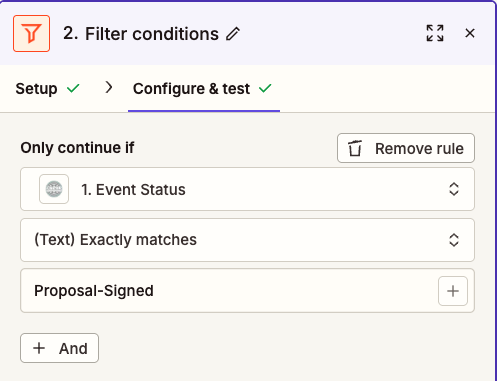
Make sure to test this step!
Adding a Search Step
For Details Flowers to add a new invoice to QuickBooks, it will need to attach it to an existing customer or create a new one. This is where the search step comes in handy.
- First, we need to add the Action Step. Click to add.
- Select QuickBooks Online as the Action App.
- To find our action, look under the Search section. Click Find Invoice.
- Click Save + Continue
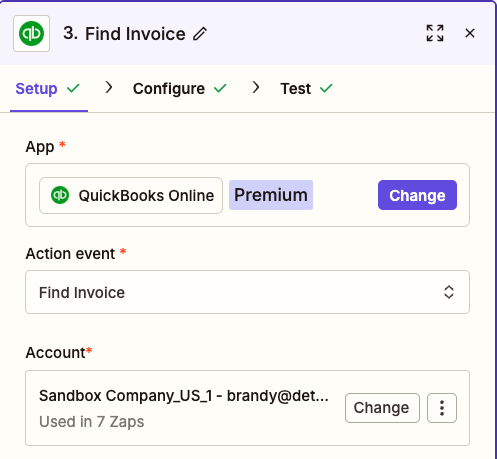
- You'll be asked to confirm the connected account. If you've not yet connected your account, click the Connect an Account button.
- Click Save + Continue.
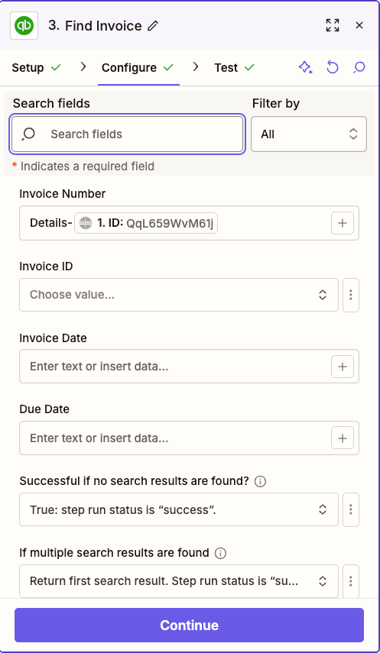
- In the Configure tab, ensure you fill in the following fields with the information listed below. For the Invoice Number field, make sure to type 'Details-' and then use the '+' symbol to add the data object 'ID' from step one
Adding a Filter Step
The next action will be a Filter By Zapier action. In the Configure tab of this action, select the following
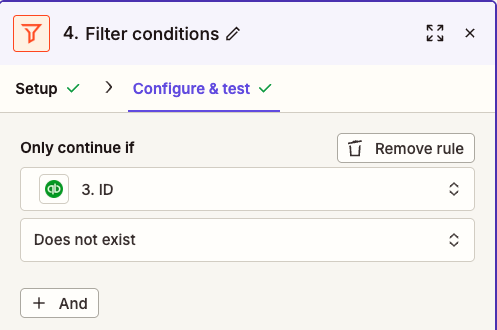
This will tell the zap to only continue if an invoice does not already exist in Quickbooks.
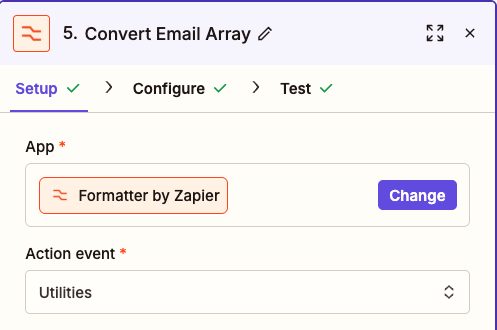
Adding a Formatter Step
From here, we need to format some of our data to fit into later steps properly. Add a step and select Formatter by Zapier as the option. In the Action drop-down, select Utilities.
In the Transform drop-down menu, select Line-Item to Text. Click the '+' symbol on the Input field to select the Contacts Email data option from step 1. Leave the Separator field blank and click Continue.
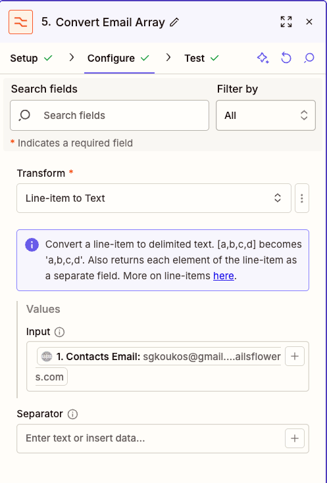
On the resulting tab, click Test Step. You should now see each email as its only data point (if you have multiple emails used on the test event you selected in step 1).
Now we will add one more Formatter by Zapier step. This will also be a Utilities step, so select Utilities from the Action Event drop-down menu
 On the Configure tab, fill in the following information, similar to how we did in the previous step:
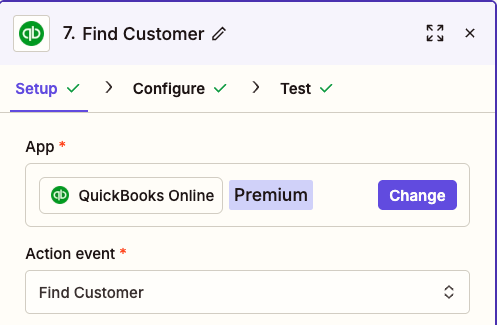
 Adding a QuickBooks Find Customer Step
For your next step, add a QuickBooks Find Customer step. Search for QuickBooks Online and select 'Find Customer' as the Action
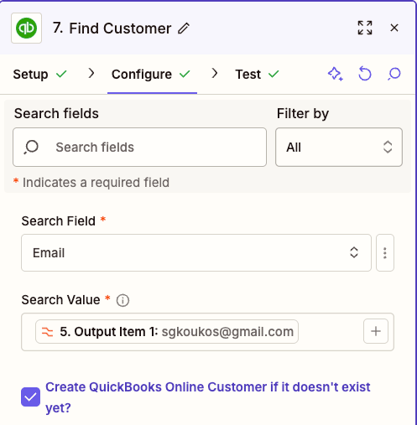
In the Configure tab, set the Search Field to 'Email' and the Search Value to Output Item 1 from step number 5, as shown below. Make sure to check the Create QuickBooks Online Customer if it doesn't exist yet.
 Next, make sure to fill in the Client Email in the Email field using the Output Item 1 from step 5, along with any other information you wish to include (address, phone number, etc.)
 Click Continue and Test Step on the resulting screen.
Action
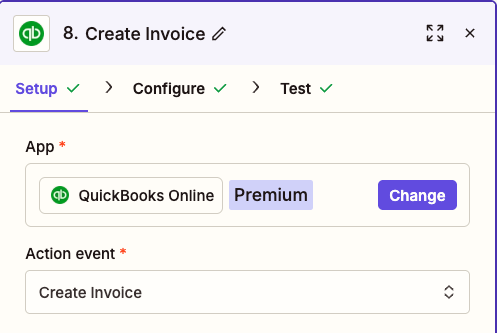
Finally, you will need to outline the invoice you would like created. Click to add another Action Step. Once again, select QuickBooks Online as your Action App. Click Continue.
Select Create Invoice as the action and click Continue.
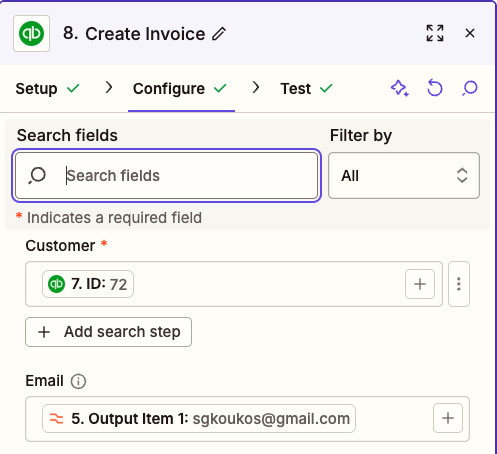
In the Configure tab, you will start with the Customer field and use the + symbol to select the ID data point from step 7. Below that, add your client's email using Output Item 1 from step 5.
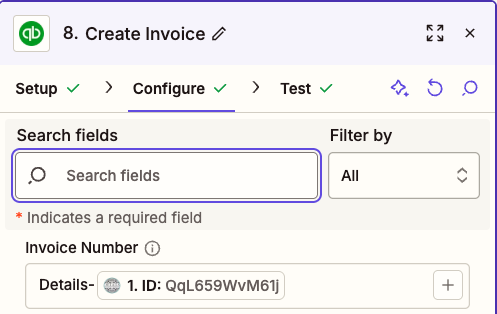
In the Invoice Number field, type Details- and then use the + symbol to select the ID data point from step 1.
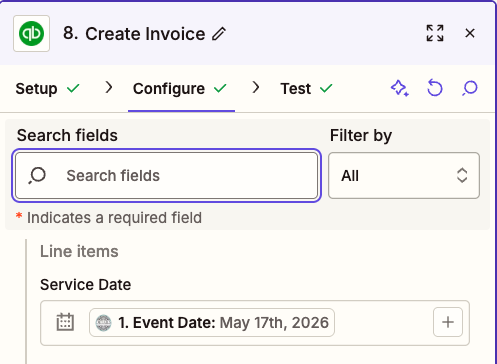
In the Line Items section, add the Event Date to the Service Date field using the + and selecting the Event Date data from step 1.
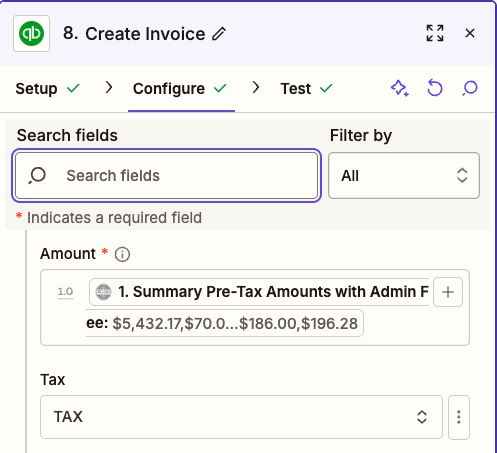
In the Amount field, add the Summary Pre-Tax Amounts with Admin Fee data point from step 1 using the + symbol. Make sure the Tax field is set to TAX.
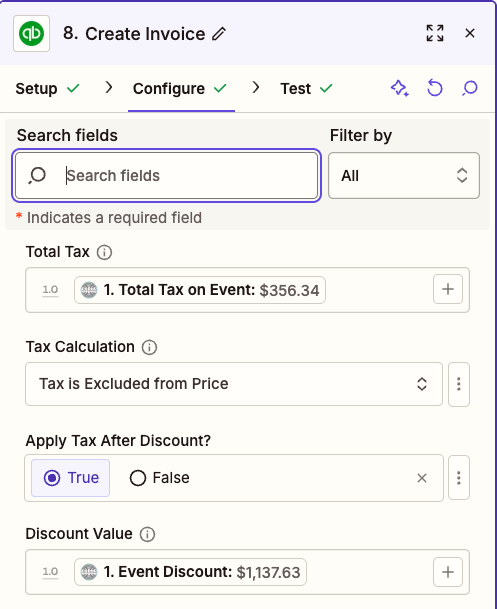
In the Total Tax field put the Total Event Tax data point from step 1 using the + symbol. We also recommend adding the Event Discount data point to the Discount Value field, in case some events include a discount. The Tax Calculation field should also be set to Tax is Excluded from Price.
Click Continue and make sure to Test Step on the next screen. Once the test invoice has been sent to your QuickBooks account, ensure everything is accurate, and then click 'Publish' in Zapier to publish the zap!
Have questions or need assistance? Reach out to our team at support@detailsflowers.com and we will be happy to help.