The Financials: Updating Percentage-Based Payments
Your default payment schedule will usually be a mixture of flat dollar amounts and percentages. The percentages will automatically recalculate anytime you save a New Version of the Design Worksheet.
Whether you're adding or taking away, your required payments (percentages only) will auto-adjust based on the changes you make. While this is done for you, you may want to adjust your Required Payments just so everything matches up (especially helpful if your client has already made multiple payments).
Below, let's take a look at an example:
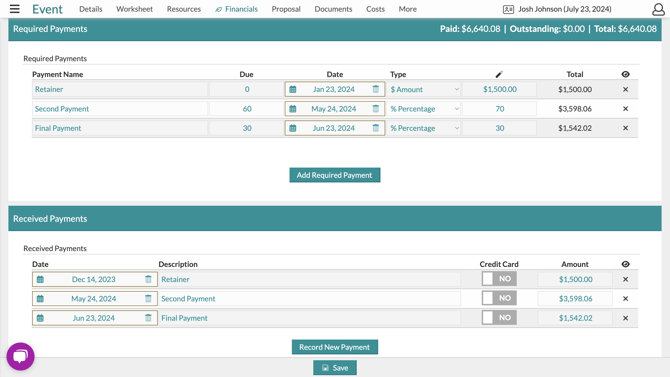
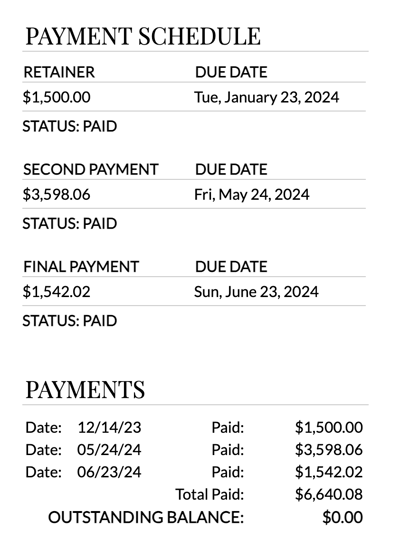
In the example below, we can see that three payments have been made that match the required payments. All payments show as PAID on the proposal summary page.


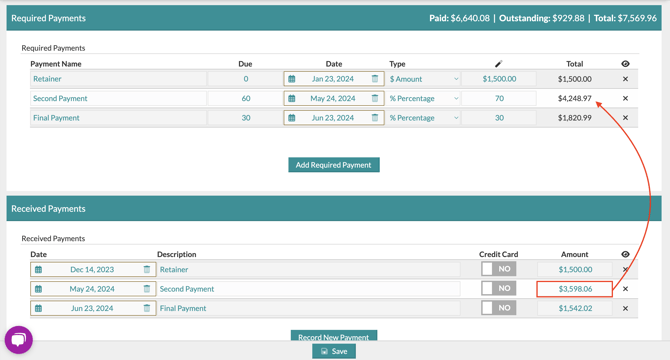
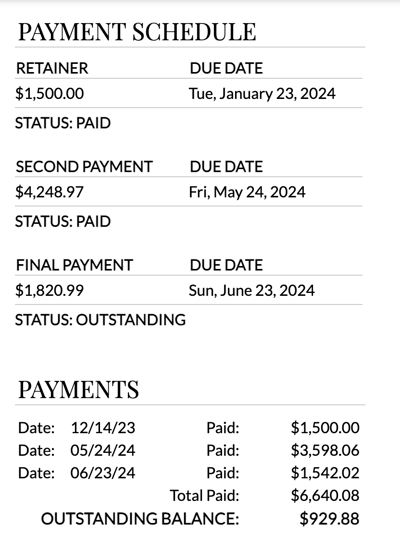
However, a couple of days after the second payment, the bride needed to add another bridesmaid bouquet and a centerpiece. When adding (or removing) additional items, the balance will be evenly distributed depending on the percentages used. In this example, 70% of the new balance was placed into the 2nd payment, and the other 30% was added to the final payment. Due to this, your summary page may show as outstanding (see below):


Even though the client technically paid the final payment, it is still showing as outstanding because the additional items increased the balance (and distributed it to all percentage required payments).
Here's what you can do:
Adjust the required payments to match the logged payments, then change the final payment to 100%. Here's an example:
.gif?width=632&height=339&name=ezgif.com-animated-gif-maker%20(1).gif)
As a recap, here's what to focus on:
- Change any percentage payments to match the logged payments (see 2nd payment example above).
- Adjust the last payment to 100%. This will ensure all added/removed funds will recalculate automatically.
- Ultimately, your client will always have the correct outstanding balance according to what's left and what they paid. It is not required to adjust your payment schedule, but it may help keep any potential confusion at bay!
