
Generating a Report
The way this works is by using the advanced search features to narrow the Event List down to include specific events based on whatever criteria is needed for the report. Once we generate the report through the search, you'll have a comprehensive list of data to view or export right from the Event List!
👉 If you're not too familiar with managing your Event List and the data being displayed, check out this Support Center article before you proceed from here: Using the Event List
To set the parameters of your report, head to the search panel of the Event list. Access the search panel by clicking the 'Search' button in the top-right of the Event List.

💡Special Tip: In your Event List Settings, you can set the search panel to be your default view in place of the Event List Pipeline!

To generate a report, you'll need to use the various search options to set the parameters of your report. Use the 'Add Search Filter' drop-down in the top-left of the search panel to include any of the parameters you'd like to search or filter the Event List by. Select the parameter and click the 'Add' button.
👉 For more specific information about searching the Event List, review this Support Center article: Searching the Event List
Once you've set up all the necessary parameters for your search, execute the search to generate your report!
Exporting a Report
This part is easy - once you've generated a report, you can click the 'Export' button in the top-right of the list to download all the information into a CSV document!

Creating a Report Template
If you're generating a report that you might need to pull again in the future, it's a good idea to save it as a template. Saving the report as a template only takes a few steps, and then you can quickly and easily load it up whenever necessary!
Follow the earlier instructions to set up the search to include all of the fields you'd like, and then click the 'Menu' button in the top-right, select 'Save Search/Report,' and there will be a few options to choose from in the resulting window:
- Name: Pretty self-explanatory here - give your report template a name to remember it by!
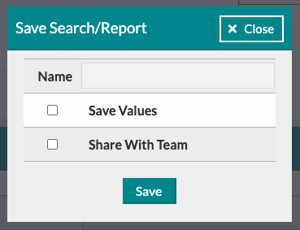
- Save Values: Check this box to include the values of a search in your saved templates. For example, saving a search that includes results for any events with a specific Event Lead from your team would need to include the value of which team member is being searched.
- Share with Team: These reports are saved by user, not by account, so if this is a saved report you'd like every user on your account to be able to access, you'll need to check this box!
Loading a Saved Report
From the search panel, click the 'Menu' button in the top-right and select 'Load Search/Report' to pull up a window listing each of your saved reports. Select the one you want and click 'Load Template' - that's it!
Check out our short walkthrough video below to see building custom reports and searching in action!